


How To Install
Learn how to install blinds and shades in a clear sequence, from checking the parts and setting level brackets to testing movement and compatible controls.
Before You Begin
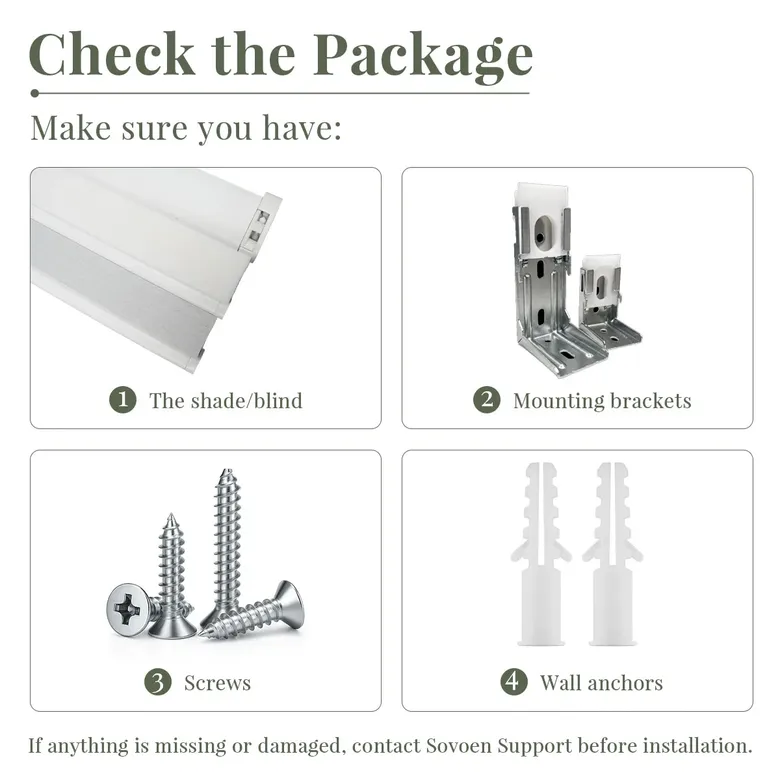
Check the Package
Make sure you have:
- The shade/blind
- Mounting brackets
- Screws
- Wall anchors
If anything is missing or damaged, contact Sovoen Support before installation.
Make sure you have:
- The shade/blind
- Mounting brackets
- Screws
- Wall anchors
If anything is missing or damaged, contact Sovoen Support before installation.
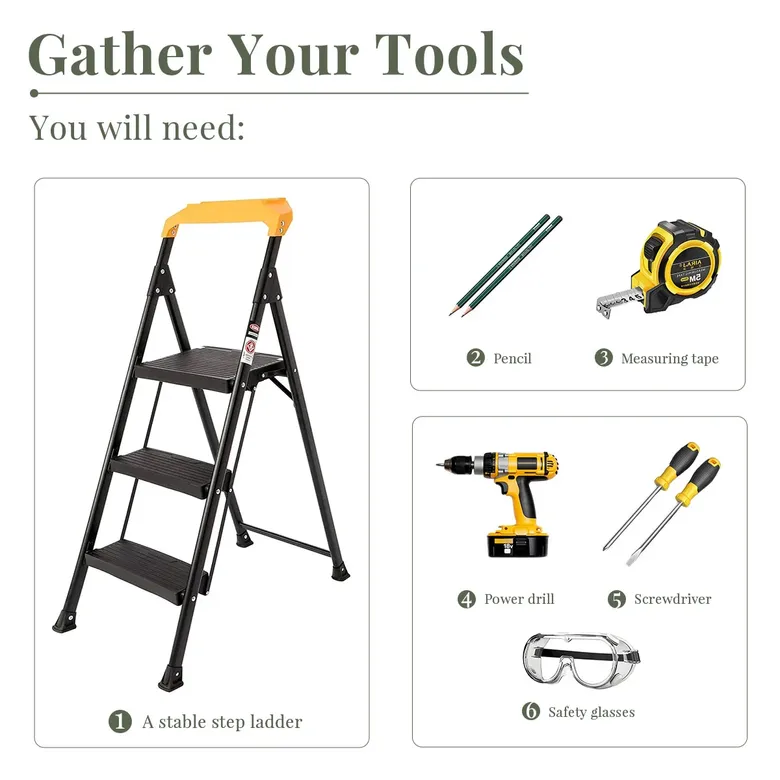
Gather Your Tools
You will need:
- Measuring tape
- Pencil
- Screwdriver
- Power drill with the appropriate drill bit
- Level
- A stable step ladder
- Safety glasses
You will need:
- Measuring tape
- Pencil
- Screwdriver
- Power drill with the appropriate drill bit
- Level
- A stable step ladder
- Safety glasses
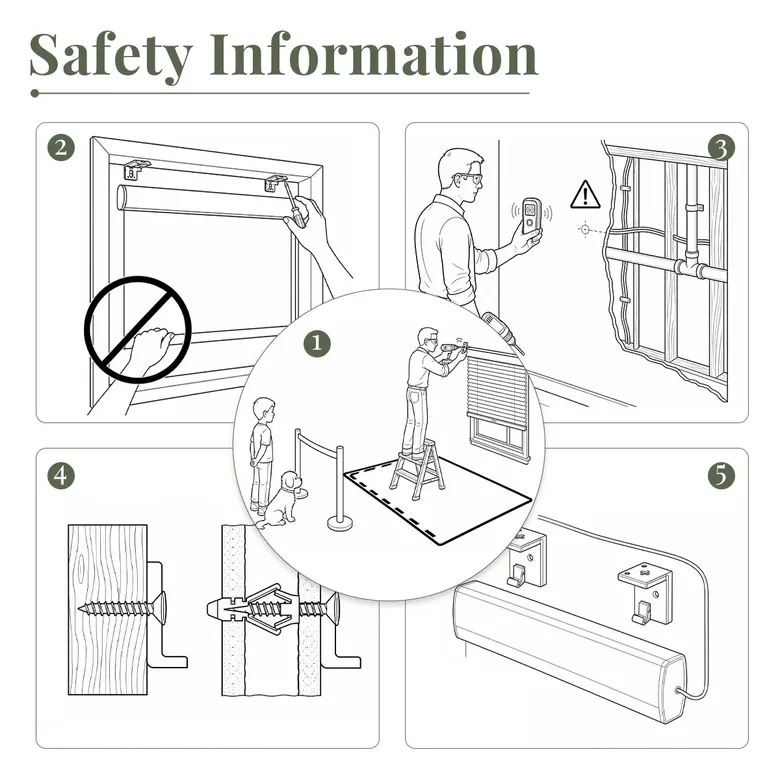
Safety Information
- Keep children and pets away from the work area and moving parts.
- Do not operate the shade/blind while installing the brackets or attaching the headrail.
- Check for concealed wiring, plumbing, and other hazards before drilling.
- Use screws or wall anchors that are appropriate for the mounting surface.
- Keep the control cord or power cable clear of the mounting brackets and locking tabs.
- Keep children and pets away from the work area and moving parts.
- Do not operate the shade/blind while installing the brackets or attaching the headrail.
- Check for concealed wiring, plumbing, and other hazards before drilling.
- Use screws or wall anchors that are appropriate for the mounting surface.
- Keep the control cord or power cable clear of the mounting brackets and locking tabs.
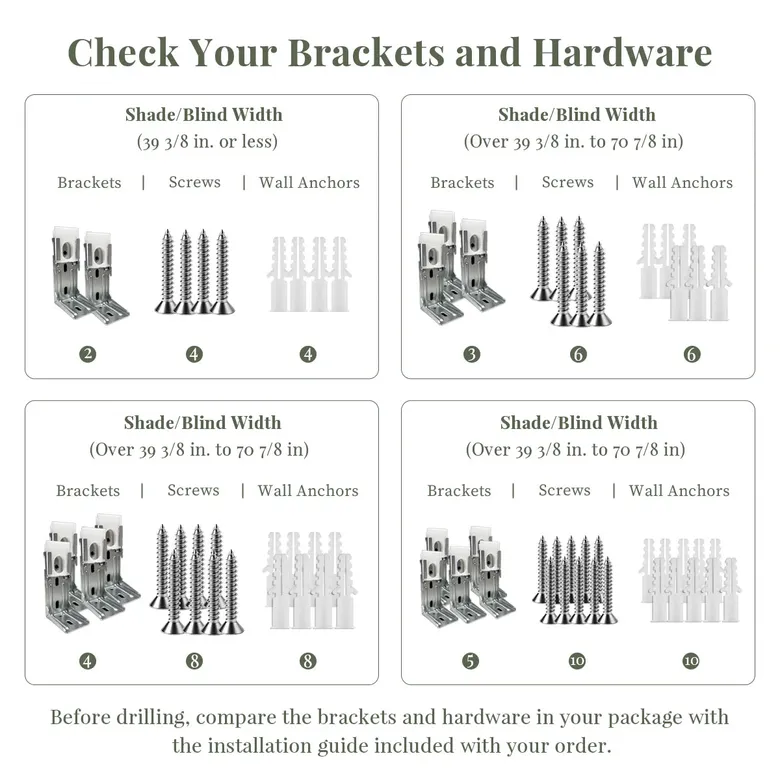
Check Your Brackets and Hardware
Use the mounting brackets included with your shade/blind. Bracket size and style vary by product.
The number of brackets and fasteners depends on the shade/blind width.
Before drilling, compare the brackets and hardware in your package with the installation guide included with your order.
Use the mounting brackets included with your shade/blind. Bracket size and style vary by product.
The number of brackets and fasteners depends on the shade/blind width.
Before drilling, compare the brackets and hardware in your package with the installation guide included with your order.
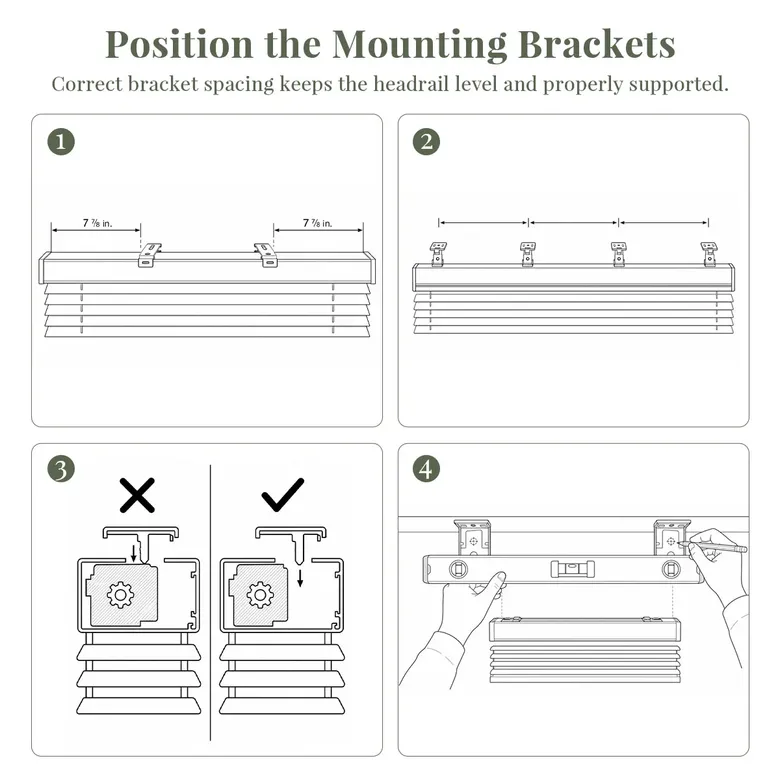
Position the Mounting Brackets
Correct bracket spacing keeps the headrail level and properly supported.
1.Position one outer bracket 7 7/8 in. from each end of the headrail.
2.If your shade/blind includes additional brackets, space them evenly between the two outer brackets.
3.Make sure no bracket or locking tab will interfere with the control cord, power cable, or other components inside the headrail.
4.Use a level to check the bracket positions before marking the screw holes.
Correct bracket spacing keeps the headrail level and properly supported.
1.Position one outer bracket 7 7/8 in. from each end of the headrail.
2.If your shade/blind includes additional brackets, space them evenly between the two outer brackets.
3.Make sure no bracket or locking tab will interfere with the control cord, power cable, or other components inside the headrail.
4.Use a level to check the bracket positions before marking the screw holes.
Discover new arrivals, design inspiration, and exclusive subscriber-only perks.

© 2026 Sovoen. All rights reserved. Intellectual Property Rights Privacy Policy